Host a Static Website on Firebase
15 Mar 2022If you’ve ever needed to host a static website for free, Firebase is a good start. It’s simple to use, and everything on it is behind a CDN, so you’re getting excellent load times pretty much anywhere in the world. This guide will be broken up into several large steps, with a few sub-steps. If you have any questions, feel free to email me.
1. Setup your domain
Every website needs a domain. I’d recommend setting up every domain you have on Cloudflare. It’s free, it caches your content around the world similar to what firebase does, and it offers a lot of security features.
Connecting a domain to Cloudflare is pretty straight forward, and not the focus of this guide. If you want a step-by-step guide for that, Cloudflare has an official guide here. Once it’s connected, we’ll need to setup the Firebase project.
2. Setup Firebase Project
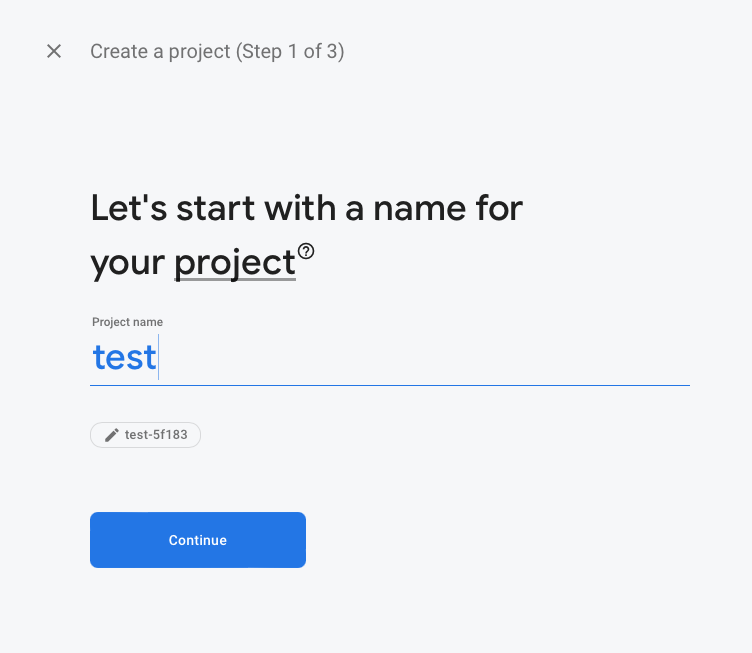
Navigate to Firebase’s website, login with your google account, and click on “Go to Console”. From here you’ll click on “+ Add Project”. Then there are 3 steps to create a new project.
- Project Name: This can be anything. I’d suggest keeping it short and to the point.
- Google Analytics: I’d recommend turning this off, or keep it on. It doesn’t really make a difference. Cloudflare does have their own analytics if you’re interested in something a little more privacy focused.
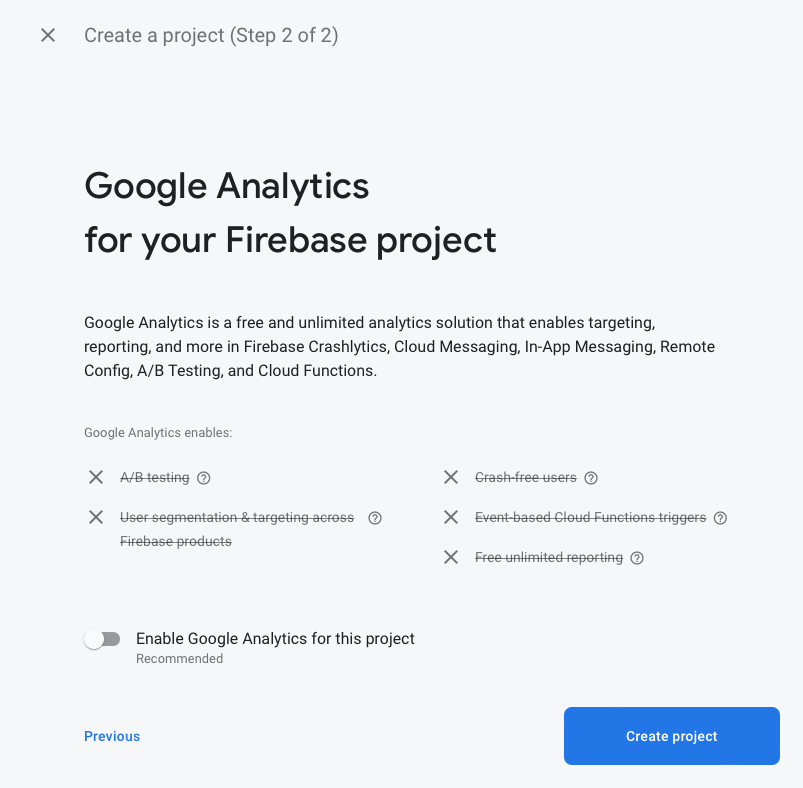
- Google Analytics Optional: If you enabled Google Analytics in the previous step, here you’ll select an analytics account.
Now that the Firebase project is created, we need some code for it.
3. Create a git repo
With your preffered git provider (I recommend GitHub for later firebase integration), we need to create a repo for your website. If you already have one, you can skip this step. So create a git repo, and if during the setup you’re offered to commit a readme and license to your new repo, do that.
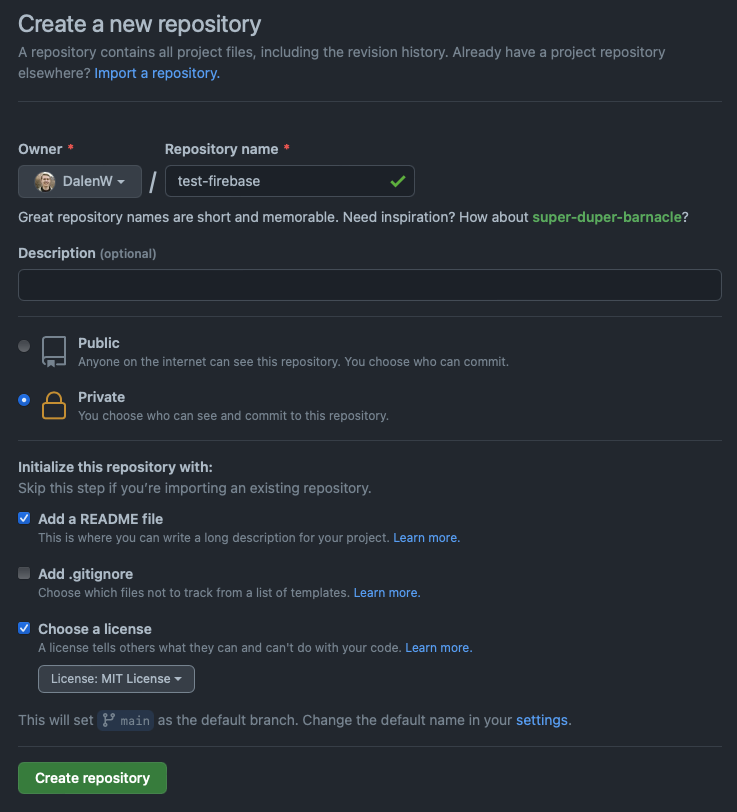
Then clone your repo onto your computer. At this point, there’s only one branch in your repo and it’s probably called “main” or “master”. Using your preffered git client, create a new branch from that commit and call it something like “release”. We’ll have at least 2 branches with this project. A master branch for development, and a release branch. The release branch will be what will be synced with your live website. With a GitHub repo, Firebase can auto-deploy your release branch as soon as it is committed to.

4. Setup Firebase in Project
In your terminal, you’ll want to navigate to your git repo. If this is the first time using Firebase, which if you’re reading this it probably is, you’ll want to install the Firebase CLI tools. With Node installed on your machine, you simply need to run npm install -g firebase-tools to install the Firebase CLI. And if you haven’t already, run firebase login to login to your Firebase account.
After that, it’s time to initalize our Firebase project. Simply run firebase init and follow the on screen instructions.
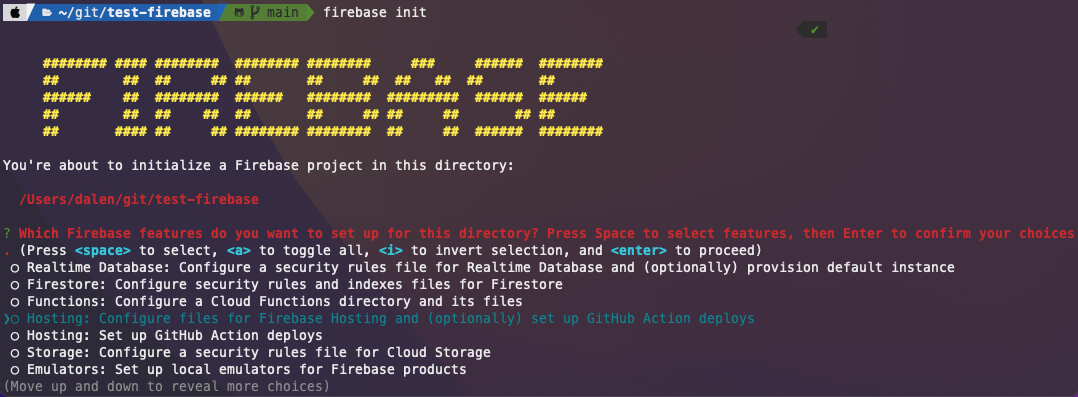 We’ll want to select hosting. Firebase has a lot of options, that you can enable later to add functionality to your website beyond serving static code. But for that purpose, we’re going to select the first “Hosting” option.
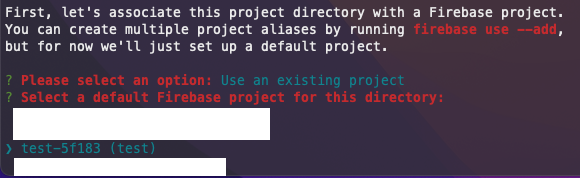
Then we’re going to select “Use an existing project”. 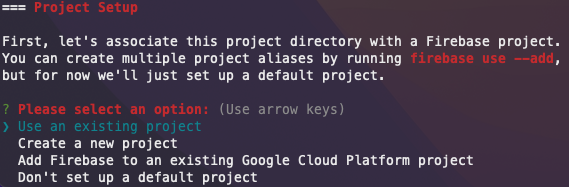
And then we simply choose our already created Firebase project in the list.
Now we’re going to setup the hosting aspect of our project.
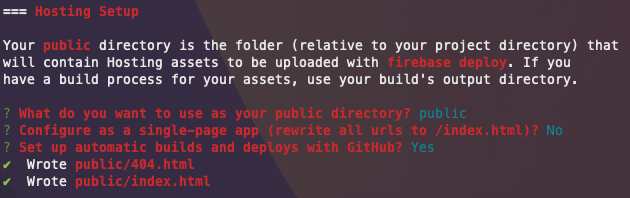 We’ll want to keep
 public as our public directory, because that makes sense. But we’re going to say no to the single page app. I’ll explain this later, but if you want your website to have multiple pages, say no to this. And we’re going to want to enable automtic builds and deploys with GitHub. Saying yes to that option will automatically connect Firebase to your GitHub account in a similar way Firebase logged you into their CLI.
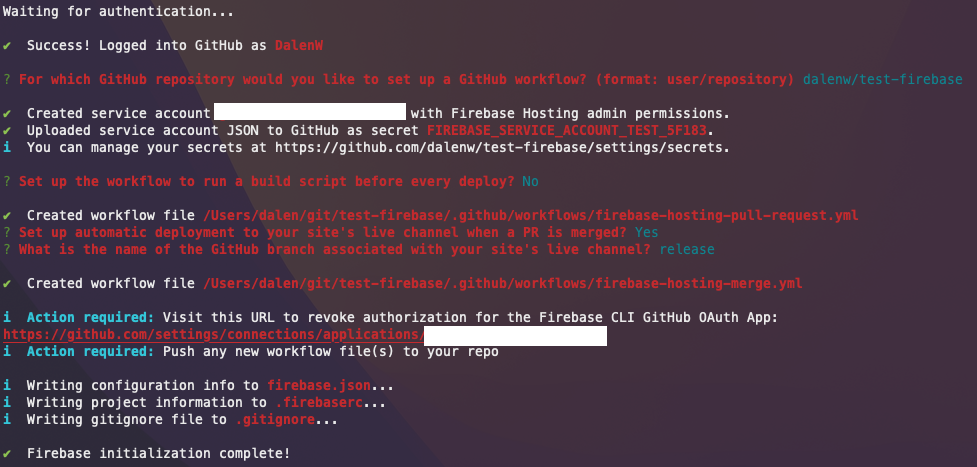 First it’ll ask us for the repository. The format for this is
 GITHUB_USERNAME/REPO_NAME. As you can see for me it was dalenw/test-firebase. We’ll want to say “No” to the build script. If you were using a framework like Jekyll or Vue to generate static content, you could auto-build with the command you put in. But this guide isn’t about that; this is to serve raw HTML.
Next we’ll want to setup auto-deployment. So give the “Yes” option like I did and type in the name of your release branch that we created earlier. What this means is that everytime the release branch is updated, usually through a pull request, it will tell Firebase to download the release branch and host it. So with this you can edit your master branch as much as you want, and Firebase won’t host your changes until it’s in the release branch.
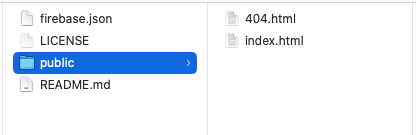
At this point we have some new files in our project. As of this post, my file structure looks like this. You’ll probably want to commit what you have right now to git.
If you run firebase serve in your terminal, it will host your website with the default files. And if you navigate to http://localhost:5000, you should see what the default files look like!
5. Configuring Firebase
The file firebase.json is where you configure your Firebase project. Right now mine looks like this:
{
  "hosting": {
    "public": "public",
    "ignore": [
      "firebase.json",
      "**/.*",
      "**/node_modules/**"
    ]
  }
}
We’re going to be editing the rewrites value of hosting in the json file. So add on to your firebase.json so that it looks like this:
{
  "hosting": {
    "public": "public",
    "ignore": [
      "firebase.json",
      "**/.*",
      "**/node_modules/**"
    ],
    "rewrites": [
      {
        "source": "/",
        "destination": "/index.html"
      }
    ]
  }
}
Rewrites contains an array of json objects under the hosting json object. Each object under rewrites needs to contain a source and a destination value.
Rewrites essentially tells firebase what to return at each url. So with the rewrite object above, if someone goes to our site and visits /, the root url, Firebase will return with index.html from our public folder. If a user tries to visit any other url but /, Firebase will return a 404.
If no rewrites exist for the requested path, Firebase will simply serve whatever matches the raw url. So if I added an about.html file to my public folder, users will have to be directed to yourwebsite.com/about.html to view it. If you completely remove rewrites like it was in the inital firebase.json, then all Firebase will still server whatever matches the raw url. But if you added in a rewrite object like this:
{
  "source": "/about",
  "destination": "/about.html"
}
Then everytime someone navigates to yourwebsite.com/about, they will be served about.html. This is an easy way to keep urls clean. You can add as many rewrites as you want.
Another interesting rewrite is this one.
{
  "source": "**",
  "destination": "/index.html"
}
What this means is that instead of returning a 404 if the request doesn’t exist, then Firebase will just return index.html. There’s a lot more you can do with rewrites, you can read more about them here
Once you’ve added some content to your website, go ahead and commit it to your master branch and then pull that branch into your release branch so that we can view your website on the web. An alternative to deploying is the command firebase deploy, but this isn’t needed with automatic deployment.
5. Connecting Firebase to your domain
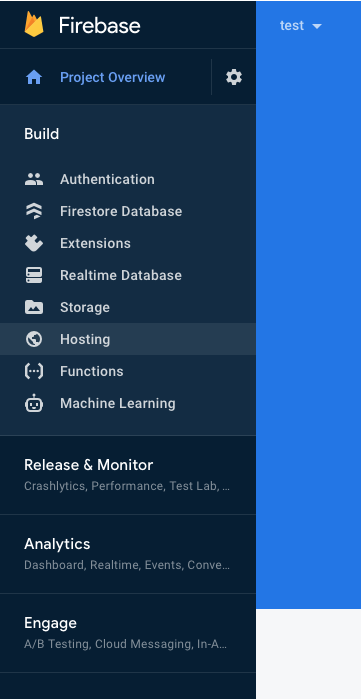
After updating your release branch, navigate to the Firebase Console online and to the “Hosting” tab.
Once there you should see a page that looks like this:
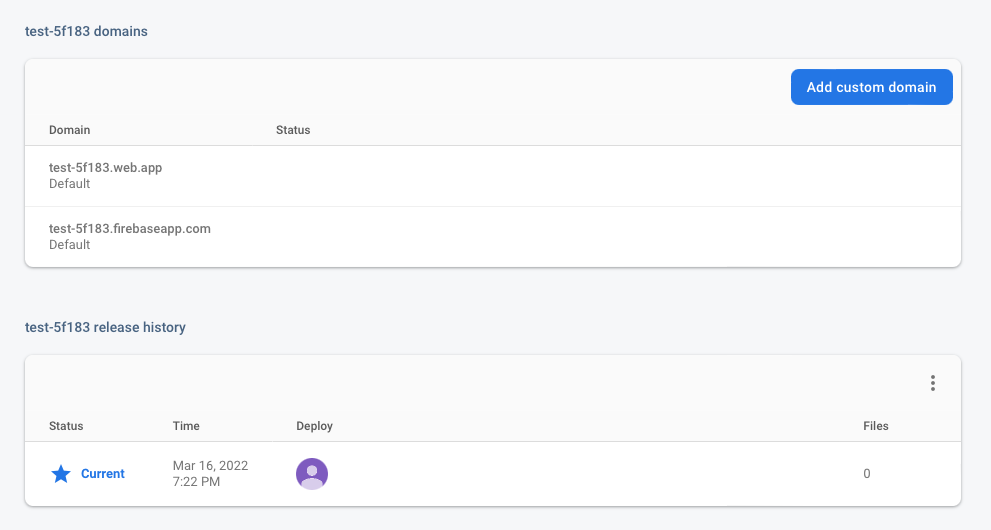
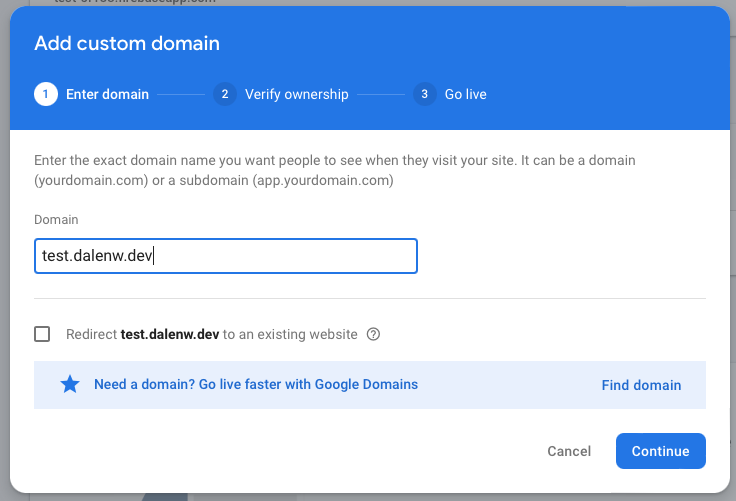
If you click one one of the domains in the table, you’ll be redirected to a live version of your website. But those domains are ugly, so let’s add our own by clicking on “Add Custom Domain”. For this I’m using the domain test.dalenw.dev, which will not be live after this post.
Anyways after you hit continue, Firebase will list an IP address and a record type of A. Copy this IP address and navigate to your DNS provider, probably Cloudflare if you set your domain up with them. Regardless, adding in a new DNS record will probably look like this:

Save that, and finish the setup on the Firebase Console. After waiting a couple minutes or so, if you navigate to your domain you’ll see your Firebase site!
Conclusion
So with this guide you setup a git repo, Firebase project, linked the two, and connected Firebase to your domain. Additionally, you can update your website automatically without having to run firebase deploy everytime you want to push your changes, and you have the start of a development pipeline by using multiple git branches. Enjoy!
If you want to, you can also enable Cloud Logging from the hosting tab or by going to your Project Settings > Integrations and clicking on Cloud Logging there. That way if a user ever reports an issue with your site, you can naviate there to view the logs and narrow down exactly what happened to cause the issue.
Updates
Update March 24, 2022
Updating the DNS on Cloudflare after connecting it with Firebase can be a little tricky and may not immediately work. Once you’re sure you’ve done it right you may need to wait a few minutes to a day for your domain to properly display your website.